by Mary Denman @MaryDenman
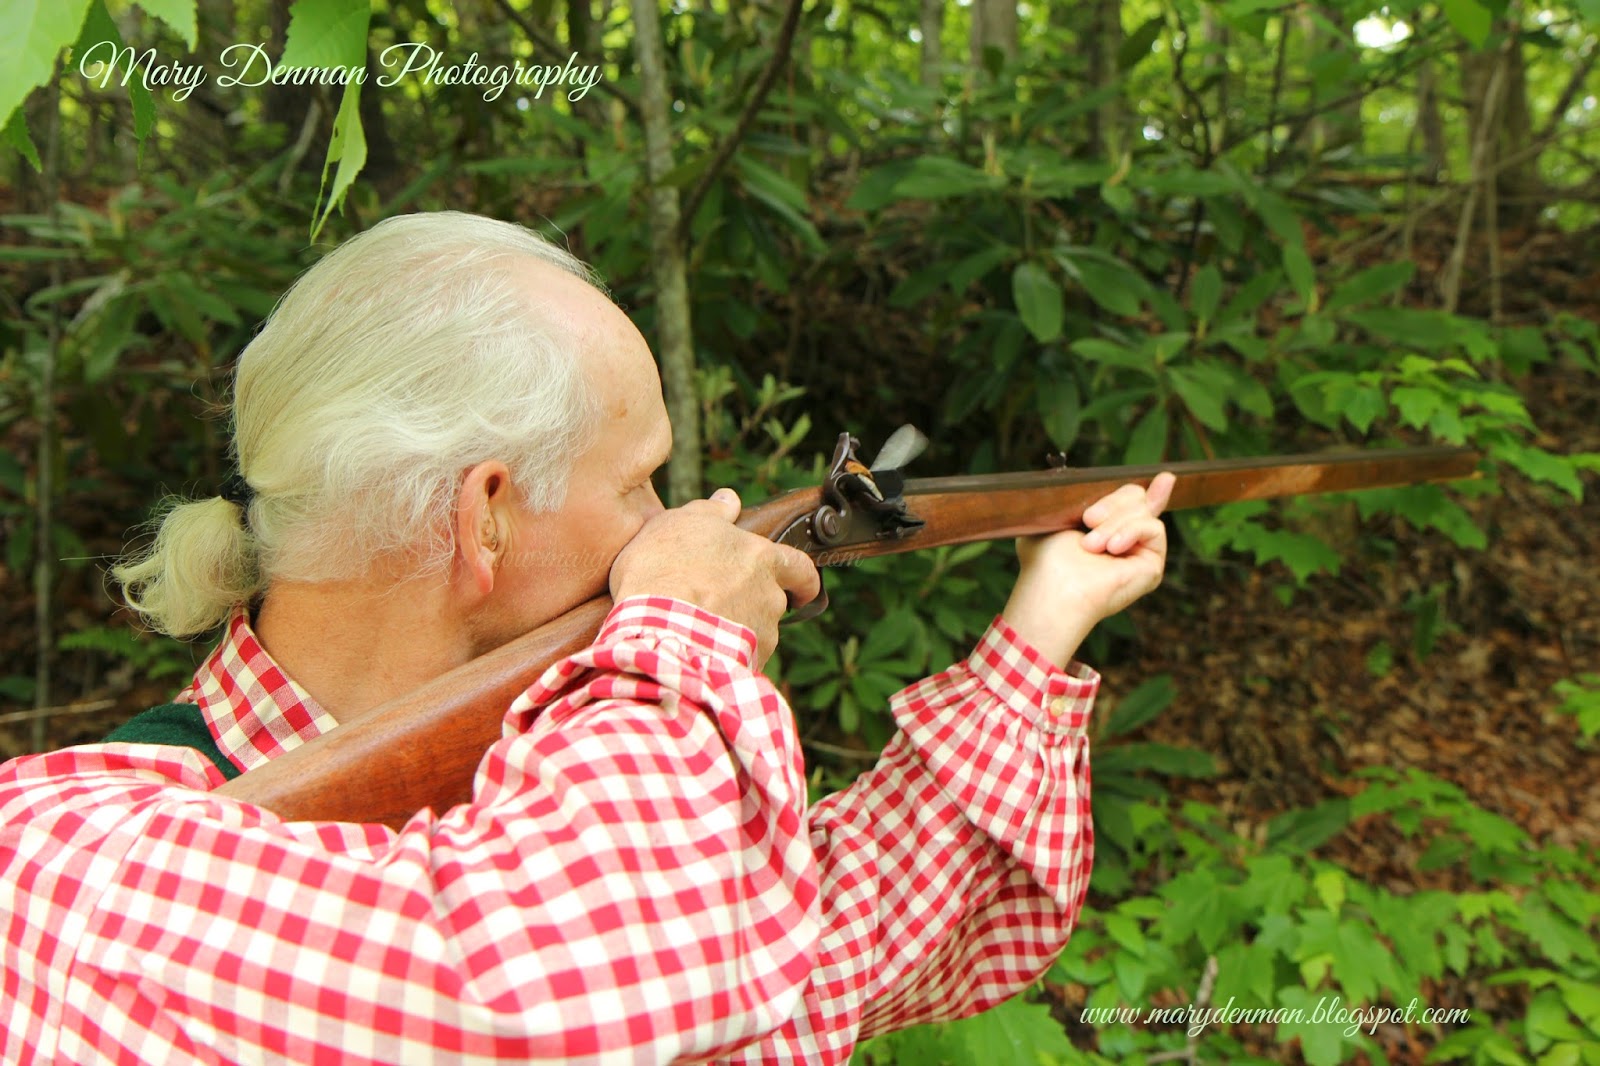
With Father's Day fast approaching here in the US, I wanted to give you some ideas of how to use your photography for personalized gifts.
All of us know a dad who may be hard to buy for, so instead of a new tie or socks, (and my hubby has actually asked for socks before), why not spend a little time thinking about something more personal for him.
That's where your photography can come in, to help create a memorable Father's Day gift.
Let's get started.
Showing posts with label photo tips. Show all posts
6.09.2016
2.26.2016
Photo Tip Friday: Taking Food Pictures in a Restaurant
by Mary Denman @MaryDenman
Many bloggers who write about food love to take pictures for their blogs. Too, many people love to upload photos and reviews of their experience to sites like Trip Advisor.
But food photography in a restaurant can be a challenge.
Today's tips are designed to help you understand what to do to improve your food photography.
Let's get started.
Many bloggers who write about food love to take pictures for their blogs. Too, many people love to upload photos and reviews of their experience to sites like Trip Advisor.
But food photography in a restaurant can be a challenge.
Today's tips are designed to help you understand what to do to improve your food photography.
Let's get started.
3.06.2015
Photo Tip Friday: The Direction of Lighting
by Mary Denman @MaryDenman
One of the most important factors in great photography is understanding lighting, lighting, lighting.
Bad lighting will ruin a great shot. While there is more that can be done with digital photography to correct bad lighting, understanding lighting goes a lot further to creating great photography.
So today we're going to go over some examples that will help you see how the direction of lighting can affect your photography.
We're going to see what happens when light is directly behind your subject, at side angle to your subject, and in front of your subject.
Let's get started.
![]() |
| Mary Denman Photography |
Bad lighting will ruin a great shot. While there is more that can be done with digital photography to correct bad lighting, understanding lighting goes a lot further to creating great photography.
So today we're going to go over some examples that will help you see how the direction of lighting can affect your photography.
We're going to see what happens when light is directly behind your subject, at side angle to your subject, and in front of your subject.
Let's get started.
9.19.2014
Photo Tip Friday: Tips for Taking Pet Portraits, Part 1
by Mary Denman
Welcome back to photo tip Friday. I'm excited to talk about how to take pet portraits. Next week will be all about action shots with your active pets!
How do you take pet portraits?
One of the first suggestions I'll make is to get down on their level. Or take the photos when they are elevated to your level.
Why?
You don't only see your pets from above. You cuddle with them. You hold them.
So if you get at eye level with them for photos, it's much more intimate.
Let's look at some other suggestions.
Welcome back to photo tip Friday. I'm excited to talk about how to take pet portraits. Next week will be all about action shots with your active pets! How do you take pet portraits?
One of the first suggestions I'll make is to get down on their level. Or take the photos when they are elevated to your level.
Why?
You don't only see your pets from above. You cuddle with them. You hold them.
So if you get at eye level with them for photos, it's much more intimate.
Let's look at some other suggestions.
Labels:
cat photography,
cats,
dog photography,
how do you take pet pictures,
how to take great pet portraits,
Mary Denman Photographer,
Mary Denman Photography,
photo tips,
photographs,
photography tips
9.12.2014
Photo Tip Friday - Part 2: How to Take Pictures of Waterfalls
by Mary Denman
Twitter: @MaryDenman
Instagram: MaryFDenman
Welcome back for Part 2 of How to Take Pictures of Waterfalls! In case you missed it, you can read last week's post here.
(Note: Last week's photos of the falls were taken right after a torrential rainstorm. This week's shots are more typical of the water flow and were shot on a different day.)
We covered the two main options for taking waterfall photos:
1) Stop the motion with a "fast speed" of film. Use an ISO of 800 or higher.
2) Blur the motion with a longer shutter opening. Use a time of 1/10 of a second or longer. (This second option requires a tripod or solid surface to set your camera on.)
Twitter: @MaryDenman
Instagram: MaryFDenman
![]() |
| The Reedy River, normal water flow |
Welcome back for Part 2 of How to Take Pictures of Waterfalls! In case you missed it, you can read last week's post here.
(Note: Last week's photos of the falls were taken right after a torrential rainstorm. This week's shots are more typical of the water flow and were shot on a different day.)
We covered the two main options for taking waterfall photos:
1) Stop the motion with a "fast speed" of film. Use an ISO of 800 or higher.
2) Blur the motion with a longer shutter opening. Use a time of 1/10 of a second or longer. (This second option requires a tripod or solid surface to set your camera on.)
9.06.2014
Photo Tip Friday - Part 1: How to Take Pictures of Waterfalls & Water
by Mary Denman
Twitter: @MaryDenman
Instagram: MaryFDenman
Today's tip is Part 1 of a 2 Part series to help you understand how to take pictures of waterfalls and water. While you may not have a waterfall that you frequent regularly, it's good to learn what to do so when it's time to take a shot, you're ready and get the photo you want!
First of all, there are two main ways to take pictures of waterfalls.
1) Take the photo at a fast enough speed to stop the action of the water.
2) Take the photo at a long enough exposure to make the water look "milky" and smooth.
These techniques are very different so I'll teach you both.
Let's get started.
Twitter: @MaryDenman
Instagram: MaryFDenman
![]() |
| Waterfall by Mary Denman |
Today's tip is Part 1 of a 2 Part series to help you understand how to take pictures of waterfalls and water. While you may not have a waterfall that you frequent regularly, it's good to learn what to do so when it's time to take a shot, you're ready and get the photo you want!
First of all, there are two main ways to take pictures of waterfalls.
1) Take the photo at a fast enough speed to stop the action of the water.
2) Take the photo at a long enough exposure to make the water look "milky" and smooth.
These techniques are very different so I'll teach you both.
Let's get started.
6.20.2014
Photo Tip Friday - How do You Have a Great Photo Shoot?
by Mary Denman
Today’s photo tip is
learning how to interact with your subject during a photo shoot for some great pictures.
While most of you may not
do photo shoots for pay, there are some valuable lessons you can learn that
will help your photography. Which will also bless others and can also help you
with your blogging.
Let’s get started.
5.30.2014
Photo Tip Friday - What is the Focal Point and Depth of Field? Part 2
by Mary Denman
Last week, in Part 1, I talked about what the focal point is and how it can change the feel of the picture. You can read about it here. Once you understand what the focal point is, you then need to learn about depth of field because they go together and can have a great impact on your pictures.
Welcome back for Photo Tip Friday!
Today is Part 2: Understanding Depth of Field.
Last week, in Part 1, I talked about what the focal point is and how it can change the feel of the picture. You can read about it here. Once you understand what the focal point is, you then need to learn about depth of field because they go together and can have a great impact on your pictures.
Let's get started learning what depth of field is and how you can control it.
Depth of field is the amount of the picture that's in focus. You can think of it as how "deep" the part in focus is in the picture.
12.23.2013
Monday's Musing - Photographing Special Events
Well, this may not be a usual Monday's Musings, but since I've missed a couple of weeks of Friday Photo Tips, I thought I'd add them here in order to help you with the upcoming holidays.
If you're blessed to have family around for Christmas or Hanukkah, I'd love to help you capture some special moments. And once again, every picture doesn't have to be ready for the National Geographic Contest.
Recently, my daughter and son-in-law graduated college. Yay! It was a great graduation with a speaker who understood the value of short, sweet, and to the point. Even though it was short, his charge was powerful. Then, the students got to cross the stage and graduate.

The president of the university hugged each and every student. Here is my son-in-law receiving his graduation hug. I like this shot because it shows the president and his personality. You get the feel of the ceremony and formality of the occasion.

Here's my daughter heading back to her seat. Even though the lighting was tough, I love her profile. Again, this picture captures the "feel" of the event.

After the ceremony was over, we headed to a little reception. But on the way, I took shots of them with family and professors. I had to take some shots on the fly. This is my husband congratulating our son-in-law. Notice there are people in the background. While I normally suggest trying to crop out others in the picture, there were so many people everywhere celebrating that it added to the mood of the moment. But, the focus of the photo is still my hubby and son-in-law.


Here are my two girls. Again, there are some people in the background. But that's okay. They're pretty blurred so they don't detract from my daughters.
But as you're documenting an event, try and get overall shots. As we were walking, I got ahead of my daughter and hubby and took a shot of them walking. I loved how they were arm in arm. And their smiles.
So as you take shots when you have family home, get some overall shots. Then move in closer. Take interesting shots of the presents, or lights, or food! Our memories fade in time, and you can use your camera to capture the mood and the people you want to remember.
As we celebrate the birth of Christ and spend time with family, may you be blessed.
Merry Christmas!
Which shots do you like?
Tell me what interesting shots you've taken!
Hope these tips help!
Keep on clicking!
If you're blessed to have family around for Christmas or Hanukkah, I'd love to help you capture some special moments. And once again, every picture doesn't have to be ready for the National Geographic Contest.
Recently, my daughter and son-in-law graduated college. Yay! It was a great graduation with a speaker who understood the value of short, sweet, and to the point. Even though it was short, his charge was powerful. Then, the students got to cross the stage and graduate.
The president of the university hugged each and every student. Here is my son-in-law receiving his graduation hug. I like this shot because it shows the president and his personality. You get the feel of the ceremony and formality of the occasion.

Here's my daughter heading back to her seat. Even though the lighting was tough, I love her profile. Again, this picture captures the "feel" of the event.
After the ceremony was over, we headed to a little reception. But on the way, I took shots of them with family and professors. I had to take some shots on the fly. This is my husband congratulating our son-in-law. Notice there are people in the background. While I normally suggest trying to crop out others in the picture, there were so many people everywhere celebrating that it added to the mood of the moment. But, the focus of the photo is still my hubby and son-in-law.


Here are my two girls. Again, there are some people in the background. But that's okay. They're pretty blurred so they don't detract from my daughters.
But as you're documenting an event, try and get overall shots. As we were walking, I got ahead of my daughter and hubby and took a shot of them walking. I loved how they were arm in arm. And their smiles.
So as you take shots when you have family home, get some overall shots. Then move in closer. Take interesting shots of the presents, or lights, or food! Our memories fade in time, and you can use your camera to capture the mood and the people you want to remember.
As we celebrate the birth of Christ and spend time with family, may you be blessed.
Merry Christmas!
Which shots do you like?
Tell me what interesting shots you've taken!
Hope these tips help!
Keep on clicking!
8.16.2013
Photo Tip Friday - Shooting in Low Light Pt. 2
Today's tip is about taking shots in dim lighting.
This week is PART 2 and we're going to cover photography in an indoor setting.
You can read PART 1 on outdoor photography in low lighting here.
Taking photographs in low light can be challenging.
So, here's a quick reminder.
Time Value = how long the shutter is open to let light in
Aperture Value = what size the aperture (shutter) is:
f/5.6 lets in more light
f/22 lets in less
ISO = "speed" or "sensitivity" of the film:
100 ISO needs bright light - think SUN
1600 ISO needs less light - CANDLELIGHT
Let's go over some photos. You'll notice I put the Time, Aperture Value (Av) and ISO on each photograph. This is to help you learn these terms so you can start to experiment on your own!
These first two shots were shot at 800 ISO which is a more "sensitive" speed of film. It doesn't need as much light. But because the stage lighting was so bright, ISO 800 allowed the picture to not be washed out. You can see the snowflakes on the wall.
And this shot also employs the silhouette technique. I wanted to create the feeling of being there, right in the middle of the stage setup.
Notice that this shot has the same Tv, Av, and ISO. But it has a different feel to it. I angled the shot to make it more interesting.
And notice that it's a little fuzzy. I was hand holding at 1/15 of a second. Remember that most people can hand hold a steady shot at only to 1/30th or 1/25th of a second. I wanted to show you that every shot I take is not crystal clear. But I like the feel of the photo.
And, if I had checked the picture a bit closer on the camera, I probably would have moved up to 1600 and retaken the shot. But photography is dynamic and every learns as they go!

Now we get to shots taken during the performance of a Christmas show. Notice the ISO is 3200. I needed the "speed" or higher "sensitive" nature of a higher ISO.
Why? Because I was sitting in a dark auditorium and wanted to make sure I stopped any motion from the people onstage. Especially of the soloist.
I zoomed in on the soloist and made sure I had the Christmas tree fully framed in the shot as well.
But in this photo, I used a wider angle on my lens to make you feel like you're sitting in the audience. You can see the silhouettes of the people in the next row. I also got the entire choir in the shot. Then, I framed it on the left side with the Christmas tree and above with the spot lights.
It was a wonderful show.

And here is one of my favorites. Flames are never the same twice. I used an ISO of 1600 and focused in closely on the flame. That resulted in everything else being black.
So, I want you to play with your camera.
Look and see if you have setting that says Av which is Aperture Value. Start at the lowest setting of 100 ISO and take a shot. Then, move on up....200, 400, 800, 1600 and maybe 3200. Just sit right where you are and see how it affects the pictures.
Then, go somewhere dark and try the same thing. Adjust the Aperture Value and see what happens.
As always, if you have a shot you're proud of, leave me a link and I'll be happy to drop by! Or, if you want me to discuss something in particular, leave me a comment.
Hope this tip helps!
Keep on clicking!
Mary
This week is PART 2 and we're going to cover photography in an indoor setting.
You can read PART 1 on outdoor photography in low lighting here.
Taking photographs in low light can be challenging.
So, here's a quick reminder.
Time Value = how long the shutter is open to let light in
Aperture Value = what size the aperture (shutter) is:
f/5.6 lets in more light
f/22 lets in less
ISO = "speed" or "sensitivity" of the film:
100 ISO needs bright light - think SUN
1600 ISO needs less light - CANDLELIGHT
Let's go over some photos. You'll notice I put the Time, Aperture Value (Av) and ISO on each photograph. This is to help you learn these terms so you can start to experiment on your own!
These first two shots were shot at 800 ISO which is a more "sensitive" speed of film. It doesn't need as much light. But because the stage lighting was so bright, ISO 800 allowed the picture to not be washed out. You can see the snowflakes on the wall. And this shot also employs the silhouette technique. I wanted to create the feeling of being there, right in the middle of the stage setup.
Notice that this shot has the same Tv, Av, and ISO. But it has a different feel to it. I angled the shot to make it more interesting.
And notice that it's a little fuzzy. I was hand holding at 1/15 of a second. Remember that most people can hand hold a steady shot at only to 1/30th or 1/25th of a second. I wanted to show you that every shot I take is not crystal clear. But I like the feel of the photo.
And, if I had checked the picture a bit closer on the camera, I probably would have moved up to 1600 and retaken the shot. But photography is dynamic and every learns as they go!

Now we get to shots taken during the performance of a Christmas show. Notice the ISO is 3200. I needed the "speed" or higher "sensitive" nature of a higher ISO.
Why? Because I was sitting in a dark auditorium and wanted to make sure I stopped any motion from the people onstage. Especially of the soloist.
I zoomed in on the soloist and made sure I had the Christmas tree fully framed in the shot as well.
But in this photo, I used a wider angle on my lens to make you feel like you're sitting in the audience. You can see the silhouettes of the people in the next row. I also got the entire choir in the shot. Then, I framed it on the left side with the Christmas tree and above with the spot lights. It was a wonderful show.

And here is one of my favorites. Flames are never the same twice. I used an ISO of 1600 and focused in closely on the flame. That resulted in everything else being black.
So, I want you to play with your camera.
Look and see if you have setting that says Av which is Aperture Value. Start at the lowest setting of 100 ISO and take a shot. Then, move on up....200, 400, 800, 1600 and maybe 3200. Just sit right where you are and see how it affects the pictures.
Then, go somewhere dark and try the same thing. Adjust the Aperture Value and see what happens.
As always, if you have a shot you're proud of, leave me a link and I'll be happy to drop by! Or, if you want me to discuss something in particular, leave me a comment.
Hope this tip helps!
Keep on clicking!
Mary
8.09.2013
Photo Tip Friday - Shooting in Low Light, Part 1
Welcome back!
Today's tip is about taking shots in dim lighting.
This week is part 1 and we're going to cover photography in an outdoor setting.
Next week, we'll cover indoor shots.
Taking photographs in low light can be challenging. I'm sure you've taken a shot outside which looked cool when you pulled out your camera. But once you took the shot, it was too dark to be worth much.
So then you turned on the flash.
Either it didn't help at all (because the subject matter was too far away) or it washed out the shot (because the subject matter was too close).
And, you came away disappointed. Well, let's try and remedy that.
A quick reminder.
Time Value = how long the shutter is open to let light in
Aperture Value = what size the aperture (shutter) is:
f/5.6 lets in more light, f/22 lets in less
ISO = "speed" of the film: sunlight uses 100
candlelight uses 1600 or higher
Let's go over some photos. You'll notice I put the Time, Aperture Value (Av) and ISO on each photograph. This is to help you learn these terms so you can start to experiment on your own!
Here's a nice, warm fire. Flames are never the same in any picture. Writers say they dance for a reason.
The flash wouldn't have resulted in the warm red and orange tones you see here. So I held the camera for 1/4 of a second. If you look closely, it's not crystal clear. But for me for this shot, that's okay. This is a "family" shot.
We were sitting around the fire with our kids. And here's one of them now.
Notice the difference in the ISO I used? When I was focusing in tight on the flames in the shot above, I used a lower ISO of 200 because fire burns so bright.
But in the second shot, I used a faster ISO of 800.
Why? I had to take into account both the very intense light of the flames and the reflected light on his face.
ISO 200 in this shot would have washed out the flames and struggled to capture enough light to see his face.
How do I know this? Because I've washed out a few pictures....
But digital gives you a great chance to learn quickly!
Okay. I love storms. I've wanted to get a shot of lightning for quite a while. Last summer, we had a massive storm come through and I took this shot from my front door. On a tripod. Even so, I, my lens and my foyer ended up soaked. But it was worth it.
This shot required a lot of patience. Lightning is so fast and bright, that you can't just "snap" a shot when you see it. Notice I left the shutter open for 4 seconds. Knowing I had to leave it open for so long, I made the Aperture f/22 which means the shutter opening is smaller and lets in less light.
I played around until I found that ISO 1600 worked well.
Mary's Cheat Sheet: Take more than one shot!
Please know that I probably took 30 photos during that storm to get 4 or 5 that were really good. Digital is free for taking shots, so take plenty, sort out later!
This is an urban, nighttime photograph.
Notice the people on the bridge are a little blurry? That's because of how long the shutter was open. I like the sense of movement they bring to the photo.
Remember for low light, outside shots, you'll need to play with your settings to get the right combination. Go outside tonight if you have time and play around with your camera. Experience is the best teacher.
Then, when you want to know what to do when you see a gorgeous sunset, or fireworks, you'll be better prepared.
Hope this tip helps!
Keep on clicking.
Mary
Today's tip is about taking shots in dim lighting.
This week is part 1 and we're going to cover photography in an outdoor setting.
Next week, we'll cover indoor shots.
Taking photographs in low light can be challenging. I'm sure you've taken a shot outside which looked cool when you pulled out your camera. But once you took the shot, it was too dark to be worth much.
So then you turned on the flash.
Either it didn't help at all (because the subject matter was too far away) or it washed out the shot (because the subject matter was too close).
And, you came away disappointed. Well, let's try and remedy that.
A quick reminder.
Time Value = how long the shutter is open to let light in
Aperture Value = what size the aperture (shutter) is:
f/5.6 lets in more light, f/22 lets in less
ISO = "speed" of the film: sunlight uses 100
candlelight uses 1600 or higher
Let's go over some photos. You'll notice I put the Time, Aperture Value (Av) and ISO on each photograph. This is to help you learn these terms so you can start to experiment on your own!
![]() |
| Mary Denman Photography |
The flash wouldn't have resulted in the warm red and orange tones you see here. So I held the camera for 1/4 of a second. If you look closely, it's not crystal clear. But for me for this shot, that's okay. This is a "family" shot.
![]() |
| Mary Denman Photography |
Notice the difference in the ISO I used? When I was focusing in tight on the flames in the shot above, I used a lower ISO of 200 because fire burns so bright.
But in the second shot, I used a faster ISO of 800.
Why? I had to take into account both the very intense light of the flames and the reflected light on his face.
ISO 200 in this shot would have washed out the flames and struggled to capture enough light to see his face.
How do I know this? Because I've washed out a few pictures....
But digital gives you a great chance to learn quickly!
![]() |
| Mary Denman Photography |
This shot required a lot of patience. Lightning is so fast and bright, that you can't just "snap" a shot when you see it. Notice I left the shutter open for 4 seconds. Knowing I had to leave it open for so long, I made the Aperture f/22 which means the shutter opening is smaller and lets in less light.
I played around until I found that ISO 1600 worked well.
Mary's Cheat Sheet: Take more than one shot!
Please know that I probably took 30 photos during that storm to get 4 or 5 that were really good. Digital is free for taking shots, so take plenty, sort out later!
![]() |
| Mary Denman Photography |
The sun had been below the horizon for a while. But the city lights and the spot lights on the falls made for a tricky picture situation. And, I wanted the water to be milky which meant I had to leave the shutter open longer.
I didn't have my tripod, so I used the rail of the bridge as my stabilizer.
![]() |
| Mary Denman Photography |
I even used the railing as my "tripod" to get this picture of the bridge itself.
Notice the people on the bridge are a little blurry? That's because of how long the shutter was open. I like the sense of movement they bring to the photo.
Remember for low light, outside shots, you'll need to play with your settings to get the right combination. Go outside tonight if you have time and play around with your camera. Experience is the best teacher.
Then, when you want to know what to do when you see a gorgeous sunset, or fireworks, you'll be better prepared.
Hope this tip helps!
Keep on clicking.
Mary
3.22.2013
Photo Tip Friday - What's that dial for? Pt. 1
Starting today, I'm going to explain what those letters and symbols on your camera dial mean. I won't do them all at once in detail. But I'll give you a quick overview today and then go into more detail in subsequent posts on how to use them.
So, let's get started.
Here's the dial on my Canon. Your symbols should be similar.
I'm going to list the "words" and what they mean first.
The symbols come in another post.
A-DEP : (I'm skipping this one for now)
M : Manual
Av : Aperture Value
Tv : Time Value
P : Program mode
A+ : Automatic
Now for more detail.
M: Manual allows you to control all the variables of Aperture, ISO, and Time Value.
Av: Aperture allows you to control the depth of field and how much light is allowed in.
Tv : Time value allows you to determine how fast you want the shutter go.
P : Program mode allows you to control the ISO or "speed" of the film.
A+ : Automatic is just that. It takes the picture automatically for you.
Ready for a little more?
Aperture is what controls your depth of field. The depth of field is how much of the photo is clear. That is, how "deep" the focus is. Apertures run from f/2.8 or so to f/22. The smaller the number, say f/2.8, means that the depth of field is shallow. But it lets in more light. The larger the number, say f/22 means you'll have a deeper amount of what's in focus. But it doesn't let in as much light.
Time value is how fast the shutter speed is. It ranges from several seconds to 1/250 of a second and faster. The brighter the room or subject, the faster you need to take the shot. Leaving the shutter open for 2 seconds on a bright day will completely white out the entire shot. Two seconds would be for a dark place and a tripod. But if you're shooting outdoors on a sunny day, then you want the shutter speed to be faster, like 1/250 th of a second.
ISO is how fast the speed of the "film" is. Remember when you had to choose your ISO for your roll of film? Well, you still have to remember what you learned. But here's the cheat sheet. ISO runs from a 100 (think bright sunny day) to upwards of 6400 (think a candle, low light settings.) The slower the speed of the film, 100 ISO, the more light you need. So a sunny day and actually most shots can be taken with 100 ISO. But if you need the speed of the film to be faster for darker conditions, then use 1600 or higher.
Once you understand about aperture, time value and ISO values, then you can go to manual and start playing around with it.
I think that may be enough for today. Next week I'll show you some examples of what the different components do.
Feel free to ask me questions. It takes a while to learn all this.
If you have a question, just leave it in the comment section. And if you leave your web address, I'll be happy to pop over to your site.And is there anything else you'd like to learn? Just let me know!
Hope this tip helps!
Keep on clicking!
Mary
Labels:
camera,
Mary Denman,
Mary Denman Photography,
photo tips
Subscribe to:
Posts (Atom)