Today's Tip is about Using Silhouettes Part 1
Welcome back!
What I love about photography is that there are so many ways to take pictures.
So many ways to express or capture a feeling in particular moment.
And today's photography technique especially creates wonderful mood in shots.
Let's get started.
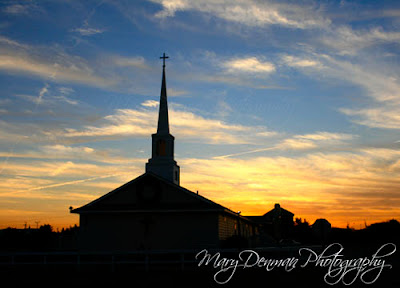 What's the first thing you notice about this and the next photograph?
Maybe the similar colors?
If that's your answer, you'd be correct.
So why is that?
Both of these shots were taken at sunset.
 With the light coming from behind the church and behind the Grand Tetons, the foreground of each shot is almost completely blacked out, creating the silhouette effect.
And, in the second shot, notice I also used the reflection technique to advantage?
Here is one of my personal all-time favorite shots.
Why? Those are my kids. We were at an aquarium and they were just watching the fish. I stood across the room, waited for everyone else to move out of the shot and I snapped away.
Notice I said I waited. Not all shots happen the second you think of them, or notice the potential for a good shot. I got far enough back and just waited. Other people were walking through, but this picture was worth capturing.
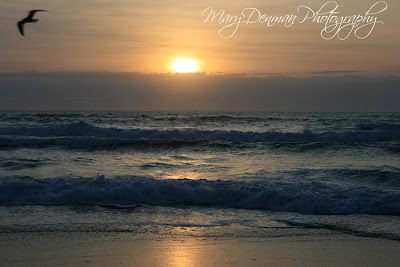 Here's another use of silhouette.
This is a sunrise shot and the silhouette is the bird. It's a seagull. You can't see the feathers or eyes of the bird, or even the color. But you can certainly feel the movement of the bird soaring.
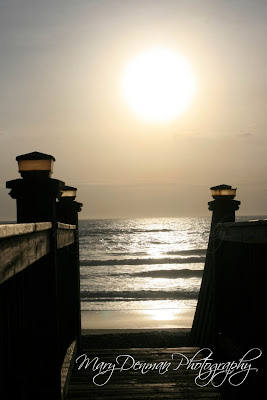
This is also the same morning. What I did was let the brilliance of the rising sun "wash out" the shot, causing the water to sparkle and the board walk to become very dark.
Again, this is creating the silhouette effect.
The strong lines of the man-made deck stand in stark contrast to the soft light of the sun and waves.
To me, the sun feels warm. It's almost like being there again.
So, to create a silhouette, you need to have the subject backlit.
In other words, have the light behind the object you're shooting.
The subject can be an object - the church, deck or mountains. Or people.
And you'll also notice that these are tricky lighting situations.
Either dimming light or direct bright light (the sun).
That requires a bit of technical explanation and I'll go into that next week in part 2. I'll teach you how to set your camera using the manual function or how to trick a point and shoot into taking these shots.
Which of these shots do you like best? As always, if you have a shot you want me to look at, leave me a link!
Go grab your camera!
Hope this tip helps.
Keep on clicking!
Mary
Past Posts:
Clink on the links above to go to those pages!
If you want to know more about a particular topic, leave me a comment and I will try to include it in an upcoming post!