Tabs

Showing posts with label photography technique. Show all posts

5.21.2015

Photo Tip Friday: Using Silhouettes in Photography, Part 2

by Mary Denman   @MaryDenman


Last week, I gave tips on how to use silhouettes in your photography. There will be a link at the bottom of today's post to view Part 1. 

Today, I'm going to go back over the same photos, but this time, listing: 

Time Value (Tv) - Shutter Speed
Aperture Value (Av) - Shutter Opening Size
ISO Value - Sensitivity of the Film

Why? So you can understand how to take these shots yourself. 

Let's get started. 


5.14.2015

Photo Tip Friday: Using Silhouettes in Photography, Part 1

by Mary Denman     @MaryDenman

PHOTO 1: A church at sunset by Mary Denman Photography

There are so many ways to express or capture a feeling in particular moment. That's why I love the creativity of photography.


Today's technique can create wonderful mood in your shots. 

I want to teach you to use backlighting to create silhouettes.


9.06.2013

Photo Tip Friday - Landscape vs Portrait Shots, Part 1

Welcome back to my Friday photography tips! 

Today, we're going to look at the same subject taken in both a landscape (horizontal) and portrait (vertical) orientation and you get to pick which one you like better. 

Next week, I'll go over more pictures and give you more tips to help decide which format to use in Part 2.

Ready? Let's go. 


This is a picture I took from our car (I was the passenger) while we were driving over a bridge. The first shot I took was vertical or portrait.  


Then, I managed to avoid all the bridge parts to get a horizontal or landscape picture. 

So, which do you like better and why? 


And here is some really cool, old brick in Charleston, SC. This is the kind of shot that would make a neat background for something on the computer. 

Here it is in portrait.


Here it is in landscape. 

Again, which do you think looks better and why?


I want you to start thinking about this. Next week, in part 2, I'll give you concrete ways to decide which direction to use. 

Leave your answers in the comment section below! 

Hope this tips helps!

Keep on clicking! 

Mary


8.09.2013

Photo Tip Friday - Shooting in Low Light, Part 1

Welcome back!

Today's tip is about taking shots in dim lighting.

This week is part 1 and we're going to cover photography in an outdoor setting.
Next week, we'll cover indoor shots.

Taking photographs in low light can be challenging. I'm sure you've taken a shot outside which looked cool when you pulled out your camera. But once you took the shot, it was too dark to be worth much.

So then you turned on the flash.

Either it didn't help at all (because the subject matter was too far away) or it washed out the shot (because the subject matter was too close).

And, you came away disappointed. Well, let's try and remedy that.

A quick reminder.

Time Value        = how long the shutter is open to let light in
Aperture Value = what size the aperture (shutter) is: 
                                f/5.6 lets in more light, f/22 lets in less
ISO                     = "speed" of the film: sunlight uses 100 
                                                              candlelight uses 1600 or higher

Let's go over some photos. You'll notice I put the Time, Aperture Value (Av) and ISO on each photograph. This is to help you learn these terms so you can start to experiment on your own!


Mary Denman Photography
Here's a nice, warm fire. Flames are never the same in any picture. Writers say they dance for a reason.

The flash wouldn't have resulted in the warm red and orange tones you see here. So I held the camera for 1/4 of a second. If you look closely, it's not crystal clear. But for me for this shot, that's okay. This is a "family" shot.


Mary Denman Photography
We were sitting around the fire with our kids. And here's one of them now.

Notice the difference in the ISO I used? When I was focusing in tight on the flames in the shot above, I used a lower ISO of 200 because fire burns so bright.

But in the second shot, I used a faster ISO of 800.

Why? I had to take into account both the very intense light of the flames and the reflected light on his face.

ISO 200 in this shot would have washed out the flames and struggled to capture enough light to see his face.

How do I know this? Because I've washed out a few pictures....

But digital gives you a great chance to learn quickly!


Mary Denman Photography
Okay. I love storms. I've wanted to get a shot of lightning for quite a while. Last summer, we had a massive storm come through and I took this shot from my front door. On a tripod. Even so, I, my lens and my foyer ended up soaked. But it was worth it.  


This shot required a lot of patience. Lightning is so fast and bright, that you can't just "snap" a shot when you see it. Notice I left the shutter open for 4 seconds. Knowing I had to leave it open for so long, I made the Aperture f/22 which means the shutter opening is smaller and lets in less light. 

I played around until I found that ISO 1600 worked well. 

Mary's Cheat Sheet: Take more than one shot! 

Please know that I probably took 30 photos during that storm to get 4 or 5 that were really good. Digital is free for taking shots, so take plenty, sort out later! 

Mary Denman Photography
This is an urban, nighttime photograph. 

The sun had been below the horizon for a while. But the city lights and the spot lights on the falls made for a tricky picture situation. And, I wanted the water to be milky which meant I had to leave the shutter open longer.

I didn't have my tripod, so I used the rail of the bridge as my stabilizer. 

Mary Denman Photography
I even used the railing as my "tripod" to get this picture of the bridge itself. 

Notice the people on the bridge are a little blurry? That's because of how long the shutter was open. I like the sense of movement they bring to the photo. 


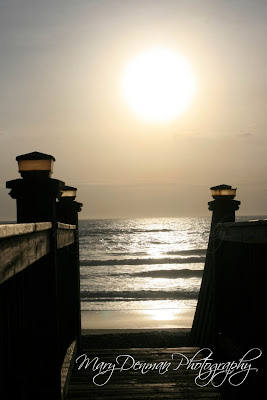
Remember for low light, outside shots, you'll need to play with your settings to get the right combination. Go outside tonight if you have time and play around with your camera. Experience is the best teacher. 

Then, when you want to know what to do when you see a gorgeous sunset, or fireworks, you'll be better prepared.

Hope this tip helps! 

Keep on clicking.

Mary

8.01.2013

Photo Tip Friday - Using Silhouettes Part 2

Welcome back! 

Last week, we started talking about using silhouettes in your photographs. 
(You can read about Part 1 here.) 

I'm going to go back over the same photos, but this time, listing: 

Time Value (Tv)
Aperture Value (Av) 
ISO Value

Why? So you can understand how to take these shots yourself. 

Let's get started. 

Here's the first shot again. 

I took a fast shot at 1/1250 sec.
The shutter or F-stop was at 5.6 which let in a lot of light. 
The speed of the film was 400 which means it needed less light for a good shot. 

Notice the color is beautiful?


If I had used a slower ISO of 100 and had to take a longer shot, the colors would have faded. 


This shot is similar in F-stop and ISO, but the light was much dimmer because the sun was behind the mountains. I had to leave it open for longer. I used 1/10 of a second. The color isn't as intense as the shot above.

(Note: I have really steady hands and have learned how to brace myself. I don't recommend this speed without a tripod.)

I also could have used an ISO of 1600 to get a faster shot. But I had it on 400 moments earlier when there was enough sunlight and just kept shooting. Photography is not an exact science. 


On to my favorite! Because most of the light was coming from the tank, that dictated that I use a fast speed. So I put my ISO on 1600. That was as high as my old camera could go. Now I have ISO 6400. So just check your camera's settings to see what you can use. 


                                                  Notice in this and the next shot that I used ISO 100. That requires a lot more light. In the first 2 pictures above, I was photographing a setting sun. The light was dimming. 

These were a rising sun. It was getting brighter by the second so I had to use ISO 100.


Any higher ISO would have completely washed out the pictures. 

I wanted the washed out effect in this one, but the one of just the surf needed more color.

So now that I've given you the more technical side of silhouette photography, I'm going to give you the Mary Cheat Sheet. 

Using the "M" setting on your dial means Manual Mode. This means you control EVERYTHING.  

Honestly, that can be pretty daunting. But here's the quickest way to take more control of your shots: learn to use the ISO feature. 

On my Canon, I use the "P" feature regularly. P stands for Program Mode. I set the ISO to the light conditions and don't worry too much about Aperture or Time Values. When you learn that ISO 100 is for bright light situations, and that 1600 or higher is for low light settings, you can quickly change how your photo turns out.

When I'm photographing my cats or kids, they move around a lot and so I set a higher ISO and then the camera takes a faster shot, freezing the motion more clearly. 

But when I want to take shots of flowers with a very blurred background, I may go on over to full Manual Mode to get the effect I want. Flowers aren't prone to running away so I can take my time and control everything on the camera. 

So, I hope this technical aspect helps. 

Which shot is your favorite? What would you do differently in any of them?

As always, if you have a shot you want me to see, please leave me a link. And, if you have a topic you want covered, just let me know. 

Hope this tip helps. 

Keep on clicking! 

Mary


7.26.2013

Photo Tip Friday - Using Silhouettes - Part 1

Today's Tip is about Using Silhouettes Part 1

Welcome back! 

What I love about photography is that there are so many ways to take pictures. 
So many ways to express or capture a feeling in particular moment. 

And today's photography technique especially creates wonderful mood in shots. 


Let's get started.  


What's the first thing you notice about this and the next photograph?

Maybe the similar colors? 

If that's your answer, you'd be correct. 
So why is that?

Both of these shots were taken at sunset. 


With the light coming from behind the church and behind the Grand Tetons, the foreground of each shot is almost completely blacked out, creating the silhouette effect. 

And, in the second shot, notice I also used the reflection technique to advantage?


Here is one of my personal all-time favorite shots. 

Why? Those are my kids. We were at an aquarium and they were just watching the fish. I stood across the room, waited for everyone else to move out of the shot and I snapped away. 

Notice I said I waited. Not all shots happen the second you think of them, or notice the potential for a good shot. I got far enough back and just waited. Other people were walking through, but this picture was worth capturing.


Here's another use of silhouette 

This is a sunrise shot and the silhouette is the bird. It's a seagull. You can't see the feathers or eyes of the bird, or even the color. But you can certainly feel the movement of the bird soaring. 


This is also the same morning. What I did was let the brilliance of the rising sun "wash out" the shot, causing the water to sparkle and the board walk to become very dark. 

Again, this is creating the silhouette effect. 

The strong lines of the man-made deck stand in stark contrast to the soft light of the sun and waves. 

To me, the sun feels warm. It's almost like being there again. 


So, to create a silhouette, you need to have the subject backlit. 
In other words, have the light behind the object you're shooting. 

The subject can be an object - the church, deck or mountains. Or people. 

And you'll also notice that these are tricky lighting situations. 
Either dimming light or direct bright light (the sun). 
That requires a bit of technical explanation and I'll go into that next week in part 2. I'll teach you how to set your camera using the manual function or how to trick a point and shoot into taking these shots. 

Which of these shots do you like best? As always, if you have a shot you want me to look at, leave me a link! 


Go grab your camera!

Hope this tip helps. 

Keep on clicking!
   
Mary


Past Posts:

Using Reflections, Part 1Part 2
What's That Dial (on your camera) For? Part 1Part 2Part 3
Discussing Some Photos (using the learned information)
Clink on the links above to go to those pages!


If you want to know more about a particular topic, leave me a comment and I will try to include it in an upcoming post!