by Mary Denman @MaryDenman
Last week, I gave tips on how to use silhouettes in your photography. There will be a link at the bottom of today's post to view Part 1.
Today, I'm going to go back over the same photos, but this time, listing:
Time Value (Tv) - Shutter Speed
Aperture Value (Av) - Shutter Opening Size
ISO Value - Sensitivity of the Film
Why? So you can understand how to take these shots yourself.
Let's get started.
Showing posts with label photography tip. Show all posts
5.14.2015
Photo Tip Friday: Using Silhouettes in Photography, Part 1
by Mary Denman @MaryDenman
There are so many ways to express or capture a feeling in particular moment. That's why I love the creativity of photography.
Today's technique can create wonderful mood in your shots.
I want to teach you to use backlighting to create silhouettes.
![]() |
| PHOTO 1: A church at sunset by Mary Denman Photography |
There are so many ways to express or capture a feeling in particular moment. That's why I love the creativity of photography.
Today's technique can create wonderful mood in your shots.
I want to teach you to use backlighting to create silhouettes.
9.06.2013
Photo Tip Friday - Landscape vs Portrait Shots, Part 1
Welcome back to my Friday photography tips!
Today, we're going to look at the same subject taken in both a landscape (horizontal) and portrait (vertical) orientation and you get to pick which one you like better.
Next week, I'll go over more pictures and give you more tips to help decide which format to use in Part 2.
Ready? Let's go.

This is a picture I took from our car (I was the passenger) while we were driving over a bridge. The first shot I took was vertical or portrait.

Then, I managed to avoid all the bridge parts to get a horizontal or landscape picture.
So, which do you like better and why?

And here is some really cool, old brick in Charleston, SC. This is the kind of shot that would make a neat background for something on the computer.
Here it is in portrait.

Here it is in landscape.
Again, which do you think looks better and why?
I want you to start thinking about this. Next week, in part 2, I'll give you concrete ways to decide which direction to use.
Leave your answers in the comment section below!
Hope this tips helps!
Keep on clicking!
Mary
Today, we're going to look at the same subject taken in both a landscape (horizontal) and portrait (vertical) orientation and you get to pick which one you like better.
Next week, I'll go over more pictures and give you more tips to help decide which format to use in Part 2.
Ready? Let's go.

This is a picture I took from our car (I was the passenger) while we were driving over a bridge. The first shot I took was vertical or portrait.

Then, I managed to avoid all the bridge parts to get a horizontal or landscape picture.
So, which do you like better and why?

And here is some really cool, old brick in Charleston, SC. This is the kind of shot that would make a neat background for something on the computer.
Here it is in portrait.

Here it is in landscape.
Again, which do you think looks better and why?
I want you to start thinking about this. Next week, in part 2, I'll give you concrete ways to decide which direction to use.
Leave your answers in the comment section below!
Hope this tips helps!
Keep on clicking!
Mary
7.26.2013
Photo Tip Friday - Using Silhouettes - Part 1
Today's Tip is about Using Silhouettes Part 1
Welcome back!
What I love about photography is that there are so many ways to take pictures.
So many ways to express or capture a feeling in particular moment.
And today's photography technique especially creates wonderful mood in shots.
Let's get started.
What's the first thing you notice about this and the next photograph?
Maybe the similar colors?
If that's your answer, you'd be correct.
So why is that?
Both of these shots were taken at sunset.
With the light coming from behind the church and behind the Grand Tetons, the foreground of each shot is almost completely blacked out, creating the silhouette effect.
And, in the second shot, notice I also used the reflection technique to advantage?
Here is one of my personal all-time favorite shots.
Why? Those are my kids. We were at an aquarium and they were just watching the fish. I stood across the room, waited for everyone else to move out of the shot and I snapped away.
Notice I said I waited. Not all shots happen the second you think of them, or notice the potential for a good shot. I got far enough back and just waited. Other people were walking through, but this picture was worth capturing.
Here's another use of silhouette.
This is a sunrise shot and the silhouette is the bird. It's a seagull. You can't see the feathers or eyes of the bird, or even the color. But you can certainly feel the movement of the bird soaring.
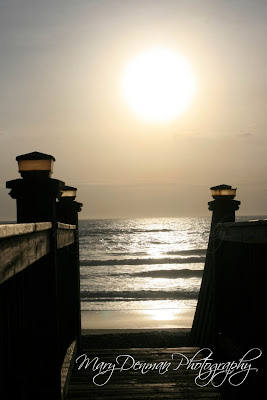
This is also the same morning. What I did was let the brilliance of the rising sun "wash out" the shot, causing the water to sparkle and the board walk to become very dark.
Again, this is creating the silhouette effect.
The strong lines of the man-made deck stand in stark contrast to the soft light of the sun and waves.
To me, the sun feels warm. It's almost like being there again.
So, to create a silhouette, you need to have the subject backlit.
In other words, have the light behind the object you're shooting.
The subject can be an object - the church, deck or mountains. Or people.
And you'll also notice that these are tricky lighting situations.
Either dimming light or direct bright light (the sun).
That requires a bit of technical explanation and I'll go into that next week in part 2. I'll teach you how to set your camera using the manual function or how to trick a point and shoot into taking these shots.
Which of these shots do you like best? As always, if you have a shot you want me to look at, leave me a link!
Go grab your camera!
Hope this tip helps.
Keep on clicking!
Mary
If you want to know more about a particular topic, leave me a comment and I will try to include it in an upcoming post!
Welcome back!
What I love about photography is that there are so many ways to take pictures.
So many ways to express or capture a feeling in particular moment.
And today's photography technique especially creates wonderful mood in shots.
Let's get started.
What's the first thing you notice about this and the next photograph?Maybe the similar colors?
If that's your answer, you'd be correct.
So why is that?
Both of these shots were taken at sunset.
With the light coming from behind the church and behind the Grand Tetons, the foreground of each shot is almost completely blacked out, creating the silhouette effect. And, in the second shot, notice I also used the reflection technique to advantage?
Here is one of my personal all-time favorite shots.
Why? Those are my kids. We were at an aquarium and they were just watching the fish. I stood across the room, waited for everyone else to move out of the shot and I snapped away.
Notice I said I waited. Not all shots happen the second you think of them, or notice the potential for a good shot. I got far enough back and just waited. Other people were walking through, but this picture was worth capturing.
Here's another use of silhouette. This is a sunrise shot and the silhouette is the bird. It's a seagull. You can't see the feathers or eyes of the bird, or even the color. But you can certainly feel the movement of the bird soaring.

This is also the same morning. What I did was let the brilliance of the rising sun "wash out" the shot, causing the water to sparkle and the board walk to become very dark.
Again, this is creating the silhouette effect.
The strong lines of the man-made deck stand in stark contrast to the soft light of the sun and waves.
To me, the sun feels warm. It's almost like being there again.
So, to create a silhouette, you need to have the subject backlit.
In other words, have the light behind the object you're shooting.
The subject can be an object - the church, deck or mountains. Or people.
And you'll also notice that these are tricky lighting situations.
Either dimming light or direct bright light (the sun).
That requires a bit of technical explanation and I'll go into that next week in part 2. I'll teach you how to set your camera using the manual function or how to trick a point and shoot into taking these shots.
Which of these shots do you like best? As always, if you have a shot you want me to look at, leave me a link!
Go grab your camera!
Hope this tip helps.
Keep on clicking!
Mary
Past Posts:
Discussing Some Photos (using the learned information)
Clink on the links above to go to those pages!
If you want to know more about a particular topic, leave me a comment and I will try to include it in an upcoming post!
Labels:
Friday photo tip,
Mary Denman,
Mary Denman Photography,
nature,
Photo Tip Friday,
photography technique,
photography tip,
photography tips,
Silhouettes in photography,
sunrises,
sunsets
3.29.2013
Photo Tip Friday - What's that dial for? Pt. 2
by Mary Denman @MaryDenman
Today's post is about Aperture Values or f-stops.
Let's recap last week's post.
Many cameras have multiple settings so you can control how you take pictures.
This is my camera's dial and settings.
The main settings we're focusing on now are:
Manual - where you have total control of the following components:
Av - Aperture Value
Tv - Time Value
ISO - which is the "speed" of your film.
I won't go back into what each component does since you can read the prior post. But I do want to give you some photos that will help illustrate what the components do.
Today, we're looking at Aperture Values.
Because they serve two functions, I'm just going over them today. We'll hit Time Value and ISO in a future post.
Apertures typically run: f/1.4, f/2.0, f/2.8, f/4.0, f/5.5, f/8, f/11, f/16, f/22
Aperture determine 2 things.
1) What your depth of field is. The term f-stop refers to Focal Stop or Focal Length. Think of this as how clear you want your photo. Do you want the entire shot clear or do you want a narrow field of focus? Let me illustrate.
The picture on the right shows a narrow depth of field. Only the front hydrangea is in focus. The bride-to-be is softly out of focus. So the f-stop or aperture is narrow. f/1.4
The reason I told you the extremes is the way I remember what the f-stops do.
Think of f/1.4 as 1.4 inches of depth of field. That's not very "deep" and not much will be in focus.
Think of f/22 as 22 inches of depth of field. That's very deep and most of your shot will be fairly clear.
So on to the next part of aperture values.
2) How much light it lets in. This is where things get a tad tricky and why we're only looking at apertures today.
Not only does it determine the depth of field, but also how much light comes in.
How it lets light in is determined by how big or little the f/stop number is because they correspond to how big your shutter opening is. I'm not going into more detail about that right now. Just know that the Av, f-stop, f/1.4 to f/22 are different names for the same things.
Let's go back to our numbers.

Today's post is about Aperture Values or f-stops.
Let's recap last week's post.
![]() |
| Canon |
This is my camera's dial and settings.
The main settings we're focusing on now are:
Manual - where you have total control of the following components:
Av - Aperture Value
Tv - Time Value
ISO - which is the "speed" of your film.
I won't go back into what each component does since you can read the prior post. But I do want to give you some photos that will help illustrate what the components do.
Today, we're looking at Aperture Values.
Because they serve two functions, I'm just going over them today. We'll hit Time Value and ISO in a future post.
Apertures typically run: f/1.4, f/2.0, f/2.8, f/4.0, f/5.5, f/8, f/11, f/16, f/22
Aperture determine 2 things.
1) What your depth of field is. The term f-stop refers to Focal Stop or Focal Length. Think of this as how clear you want your photo. Do you want the entire shot clear or do you want a narrow field of focus? Let me illustrate.
In the second shot, the lovely bride-to-be is all in focus. This shows a much deeper amount of focus in the shot. Think of this shot with a large f-stop. f/22.
The reason I told you the extremes is the way I remember what the f-stops do.
Think of f/1.4 as 1.4 inches of depth of field. That's not very "deep" and not much will be in focus.
Think of f/22 as 22 inches of depth of field. That's very deep and most of your shot will be fairly clear.
So on to the next part of aperture values.
2) How much light it lets in. This is where things get a tad tricky and why we're only looking at apertures today.
Not only does it determine the depth of field, but also how much light comes in.
How it lets light in is determined by how big or little the f/stop number is because they correspond to how big your shutter opening is. I'm not going into more detail about that right now. Just know that the Av, f-stop, f/1.4 to f/22 are different names for the same things.
Let's go back to our numbers.
Apertures typically run: f/1.4, f/2.0, f/2.8, f/4.0, f/5.5, f/8, f/11, f/16, f/22
So what does that mean? f/1.4 lets in the most light on the f-stop scale
f/22 lets in the least amount of light on the scale
You can handhold a camera and take shots in the lower range like f/1.4.
But not at f/22. You'll need a tripod.
Why? Because you have to let in more light which means the shutter has to be open longer.
Here's an example of why you may want to learn how to manually control your camera. You can't take a shot like this without learning how.

You can't get this with a point and shoot camera or setting.
In order to get the milky effect of the water, you have to have the shutter open (time value, another post) for part of a second or more, depending on the lighting.
This shot was taken at f/22 for about 3/4 of a second. On a tripod.
f/22 insured that most of the photo was in focus, and allowed the camera enough time to to capture the individual drops of water actually falling, making them milky white and soft.
So, what does this mean for you?
Pick up your camera and play with it. Set the camera on Av if you have that setting and take shots right where you are. Around the house is fine. EXPERIMENT!
I'm sure you'll have more questions once you do. But it will help you learn this material. And, as I continue to guide you through the dial, the pieces will start falling together.
Again, if you have photos you'd like me to glance at, leave me a link.
And if you have a question, feel free to leave it for me.
Of the two engagement shots, which one do you like better and why?
Hope this tip helps!
Keep on clicking!
Mary
Labels:
aperture,
engagement,
f-stop,
focal length,
hydrangea,
Mary Denman,
Mary Denman Photography,
photography tip,
time value,
waterfall
2.08.2013
Photo Tip Friday
Today's Tip: Take your camera with you and use it!
While today's tip may be obvious, it needs to be said.
We think of taking pictures of landscapes, people and birthday parties. But what about your daily life?
You might think of what I'm suggesting as photo journalism. Or a sort of photo diary of your life.
So when can carrying your camera come in handy while out? I'm glad you asked.
This past Dec., my husband and I went to go pick up our son from his first semester of college. We arrived on campus after his final swimming workout. Since all the other students were gone and the cafeteria was closed, the university had arranged with a local eatery to feed the swimmers.
We didn't know when we arrived that the guys were ready for food. But when they told us of the arrangement, we headed in to get them some well earned breakfast.
Thankfully, I had my camera on hand. We had a great time with our son and another swimmer we were giving a ride to the airport. Just looking at the photos makes me smile. They had stacks of French toast, pancakes and lots of syrup.
Here, you can see the place radiated with an ambiance that comes from years of use and little updating.
Without a camera on hand, I couldn't have documented that morning in the diner with our son. Even seeing the pictures gives me that feeling of happiness that he has done well his first semester and was coming home for Christmas.
So, take your camera with you and document unexpected events that occur.
Do you have any special photos that bring you a smile when you see them? Please share if you do.
Hope this tip helps!
Keep on clicking!
Mary
Labels:
Mary Denman,
Mary Denman Photography,
photo,
Photo Tip Friday,
photography tip,
photography tips
12.22.2012
Photo Tip Friday - Taking Pictures That Tell a Tale
![]() |
| Posing for a Christmas morning shot |
It also means it's a great time to take pictures and document, document, document!
So, what makes a good photo during the holidays? Let's look at a few examples.
People are very important. It's great if you can actually get your kids, nieces or nephews to sit still for a photo. A posed shot is wonderful. However, they usually aren't going to pose for long.
![]() |
| Boy in motion! |
Let's move on to other shots that document special moments. Maybe they involve pets. Here is what I call a "mood" shot. We have one cat who loves sleeping under the tree. I got down on my stomach to take this picture. Isn't he so sweet? You can tell it's before the hustle and bustle of opening presents. This is a nice memory.
And here's another pet photo. Yes, our cat is actually watching the television while we opened presents to the Nutcracker. :)
And lastly, here are three of our cats interested in an electronic lightning bug in a jar. The picture may be a little cluttered, but it shows the cats looking at the jar in the middle of my son's Legos, which he started building immediately. When he's much older, this will be a reminder for me of the time when he was little.
So, what shots have you taken that your proud of or that are special to you?
Leave me your link and I'll be happy to head over to your blog and take a look.
Hope this tip helps!
Keep on clicking!
And Merry Christmas or Happy Hanukah!
Labels:
Christmas,
Mary Denman,
Mary Denman Photography,
photography tip,
photography tips,
presents
11.09.2012
Photo Tip Friday
Part One - Strong Lines in Nature
Today's photo tip is learning how to use strong lines to create unique shots.
Let's get started.
The shot to the right is of an extremely interesting log that is covered in a beautiful striped fungi. Notice the strong vertical line that I used to show off this log? It's not completely centered, but it does run vertically. And it catches your eye.
Don't feel it has to run straight through the center of the frame. But do use vertical lines.
But let's look at a different use of lines.
This hosta leaf doesn't have straight lines. They're curved. So to make this photograph stronger, I made sure to focus fairly closely. I don't have any edges showing because that would introduce other lines that would be distracting.
Close in on your lines to take a better shot.
And now to some winter shots.
These are icicles. They lend themselves to vertical lines.
Aren't they just beautiful?

These next two shots involve frozen rain on some small branches.
I felt this shot was most powerful taken horizontally. And notice this branch is straight as compared to the next shot which is a curved branch covered in ice.
Try different angles with any subject. While both of these photos are taken horizontally, they have a different feel to them.
And as a parting shot, notice how simple this picture is. I got down low and looked up, using the deep blue, clear sky as a simple background to set off the twig and the single drop of ice.
This shot uses both a vertical and horizontal element to strong effect.
So start looking for strong lines that stand out in nature, and see what gorgeous pictures you can take.
Go grab your camera and experiment.
Hope this tip helps!
Keep on clicking!
Today's photo tip is learning how to use strong lines to create unique shots.
Let's get started.
The shot to the right is of an extremely interesting log that is covered in a beautiful striped fungi. Notice the strong vertical line that I used to show off this log? It's not completely centered, but it does run vertically. And it catches your eye.
Don't feel it has to run straight through the center of the frame. But do use vertical lines.
But let's look at a different use of lines.
This hosta leaf doesn't have straight lines. They're curved. So to make this photograph stronger, I made sure to focus fairly closely. I don't have any edges showing because that would introduce other lines that would be distracting.
Close in on your lines to take a better shot.
And now to some winter shots.
These are icicles. They lend themselves to vertical lines.
Aren't they just beautiful?

These next two shots involve frozen rain on some small branches.
I felt this shot was most powerful taken horizontally. And notice this branch is straight as compared to the next shot which is a curved branch covered in ice.
Try different angles with any subject. While both of these photos are taken horizontally, they have a different feel to them.
And as a parting shot, notice how simple this picture is. I got down low and looked up, using the deep blue, clear sky as a simple background to set off the twig and the single drop of ice.
This shot uses both a vertical and horizontal element to strong effect.
So start looking for strong lines that stand out in nature, and see what gorgeous pictures you can take.
Go grab your camera and experiment.
Hope this tip helps!
Keep on clicking!
11.02.2012
Photo Tip Friday
Today's tip for improving your photography is to learn to use light more effectively.
Lighting is a huge topic so I'll apply it to fall leaves.
I'm going to start out with a picture where the lighting wasn't right. Sometime you can try and force a shot, but it just doesn't come out how you really want it.
What's wrong with this picture? Well, the leaves in the foreground are dark. There's not much direct sunlight on the leaves. But the background is extremely bright. In some cases, this might work. But it didn't here. There isn't a good focal point.
How about this shot? See the difference in using proper lighting? This shot pops. It almost looks like it's on fire.
Why? Because I got the lighting right. This tree was in a yard on the corner of a road. So, I drove to the side where the sun was behind the tree, illuminating the leaves.
As I've said before, move around your subject to catch the best angle. Whether it's a tree, person or your pet.
This is a close up of the tree. Notice how I isolated the trunk. I like this photo because it has an interesting contrast. The trunk looks almost black and that sets off the brilliance of the leaves.
This is a different take on using light behind your subject to create a memorable shot.
Again, in this case, the sun was behind the leaf. Look at the shadows created. It takes an ordinary leaf and make a very unique shot.
So, when you're out and about with your camera, look for opportunities to let the sunlight create beautiful moments you can catch.
Go grab your camera and head out.
Hope this tip helps!
Keep on clicking!
Lighting is a huge topic so I'll apply it to fall leaves.
I'm going to start out with a picture where the lighting wasn't right. Sometime you can try and force a shot, but it just doesn't come out how you really want it.
What's wrong with this picture? Well, the leaves in the foreground are dark. There's not much direct sunlight on the leaves. But the background is extremely bright. In some cases, this might work. But it didn't here. There isn't a good focal point.
How about this shot? See the difference in using proper lighting? This shot pops. It almost looks like it's on fire.
Why? Because I got the lighting right. This tree was in a yard on the corner of a road. So, I drove to the side where the sun was behind the tree, illuminating the leaves.
As I've said before, move around your subject to catch the best angle. Whether it's a tree, person or your pet.
This is a close up of the tree. Notice how I isolated the trunk. I like this photo because it has an interesting contrast. The trunk looks almost black and that sets off the brilliance of the leaves.
This is a different take on using light behind your subject to create a memorable shot.
Again, in this case, the sun was behind the leaf. Look at the shadows created. It takes an ordinary leaf and make a very unique shot.
So, when you're out and about with your camera, look for opportunities to let the sunlight create beautiful moments you can catch.
Go grab your camera and head out.
Hope this tip helps!
Keep on clicking!
Labels:
autumn,
fall color,
Mary Denman Photography,
nature,
photo,
Photo Tip Friday,
photographer,
photography tip,
photography tips
10.26.2012
Photo Tip Friday
Tip Friday : Macro, Part 2
There are a couple of ways to take macro shots.
The first one involves using a setting on your camera. Whether your camera is a "point and shoot" or "SLR = Single-Lens Reflex", it should have a setting on the wheel that shows a flower. See the flower on my camera? That's your camera's indication telling you to use that setting for doing macro shots.
So, you need to set the camera on the macro setting. This will enable you to get closer to your subject. The closer you get to your subject, the more detail you can get.
The caveat for this setting, though, is that the camera decides if you need a flash or not. And you can't overrule that. So practice using the "flower" setting and see how it works for you.
On to technique two. This just uses the regular setting on your camera. So, how is this technique preferable to your camera's macro setting? The obvious answer is that you control whether or not you need the flash. Because usually, it you're using a flash on a very close subject, you will tend to wash it out.
Just move in closer to your subject. Your camera should focus for you. It will only let you get so close before it can't focus anymore. That's your clue to back up.
And here's a macro shot of an apple. Notice how crisp and clear the stem is? Doesn't this shot just make you want to take a bite?
You can use macro on just about anything.
So grab your camera and start experimenting!
Hope this tip helps.
Keep on clicking.
Mary
Subscribe to:
Posts (Atom)